
I’ve advocated for fully resetting a troubled (or even untroubled) PC for the cleanest-possible fresh start, but if you’re looking for something less drastic, there’s a less known option that lets you repair your PC with no loss.
The only requirements to use this lossless repair are that 1️⃣ you can login to your PC normally and reach your desktop (not using safe mode or other failsafe options), and 2️⃣ you have administrator-level access. If you don’t fit these two requirements, a full clean install may be needed instead. The major difference between this repair and a fully clean install, is that a repair is launched from within an already logged-in desktop. If you were to boot-up from the setup disc (or USB), you would be unable to perform an upgrade or repair like this.
Choose your method below. Windows 11 can use either method, older versions of Windows can only use the 3-step method.
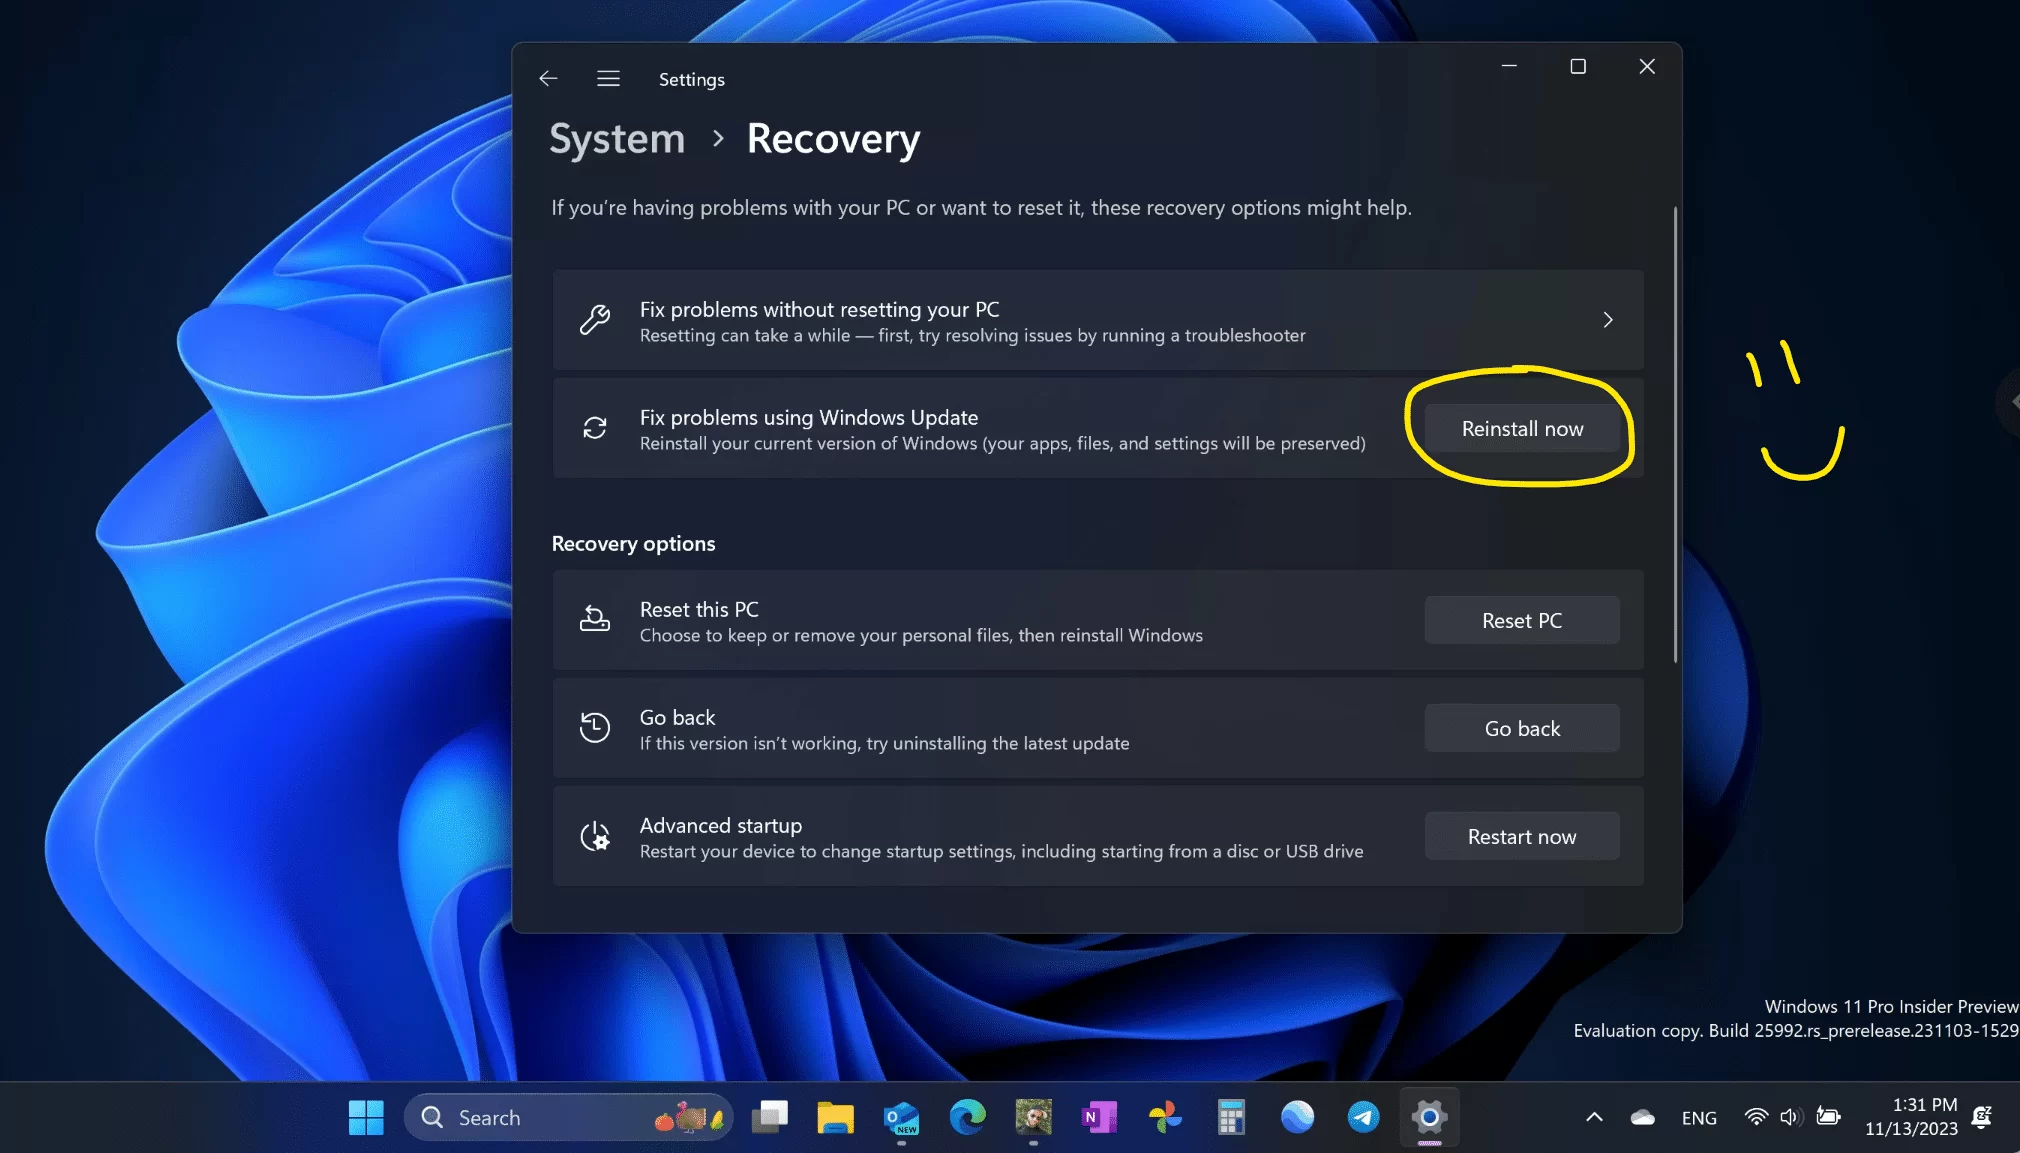
The 1-Step Repair Method (new to Windows 11)
The repair process is so reliable and basic (considering you “just click next” through the setup), that it seems Microsoft is now keen on adding a “reinstall without loss” directly to the OS as a one-click option. If you have this new button available, I’d recommend trying it first. If it doesn’t work, try the three-step method described further down.
Important: do not click reset. Unlike the repair without loss, the reset will cause you loss and pain.

The 3-Step Repair Method (Windows 10 and earlier)
The manual process is the same on Windows 10 or 11. Here’s a totally unedited demo of the entire process described below, on both systems at once. Scroll down to see the easy written steps and links you’ll need.
This repair is sometimes called a repair install or an in-place-upgrade because it’s identical steps to upgrading, but you’ll be staying on the same system version. This repair method has been typical for decades, going back to the 90s when we did this using the actual DVD (or CD-ROM) discs.
Below are the details of these three general steps:
- Download the Media Creator Tool.
- Use Media Creator Tool to download the Windows Setup ISO file.
- Open the ISO file and run Setup.exe file.
Similar to the full clean install, you’ll begin here by first downloading and running the Windows Media Creator tool. Unlike a full reset however, you do not need a USB stick for this process. That would be for a reinstall, not a repair like this.
Step 1 and 2) Download Media Tool and use it to Acquire the Windows Setup Disc Image (ISO)
When you download and run the Windows Media Creator tool, just step through the pages and choose to save an ISO file when prompted. It will ask you twice — just choose the option that mentions ISO each time. While the Media Tool will claim you need to burn the ISO file to a DVD later, that’s not really the only way to use it.
An ISO file is a disk image file which stores the necessary data to create a replica of a DVD optical disc. In this case, it’s a file equivalent of the Windows setup disc, the same as you’d get in a retail box copy of the Windows operating system from some big store.

Microsoft provides other ways to acquire a Windows Setup iso file, but the method above is my preferred guidance.
The Media Creator Tool will eventually let you choose where to save the windows.iso file, and you can pick anywhere you wish, there is no requirement here. Once it is done downloading, the Media Tool will also helpfully provide a direct link to the saved file.
Step 3) Repairing your installation
When you open the windows.iso file you saved, it will open very similar to opening a .zip file, with more files inside it, although you’ll notice it appears like a new drive, as if you had inserted a DVD disc into your computer.

Inside this folder window showing the DVD setup disc contents, find and double-click the setup.exe file. Run that through the full process, choosing to keep everything when prompted.
Following that quick setup process and the reboot at the end, you hopefully will have repaired your installation. Again, this is not destructive so you will not need to reinstall any programs/apps/settings after you’re done. It’s really one of the best options you can use when other steps have failed.
What if it doesn’t work?
If you cannot run the Media Creator Tool or setup.exe opened from the ISO file does not help fix the issue you’re having, it may be necessary to perform a full system reset or even clean installation entirely. These are more drastic and involve some level of loss (loss of applications or preferences) but are generally not too difficult or troublesome as long as you have responsible backups at all times. Having to reinstall Office or a game again is hardly the worst case, as long as critical data is backed up in at least two places.
Leave a Reply